
It’s that time of year when snow can be found falling from the sky or laying on the ground. Playing in the snow is a fun activity when the snow piles up!
One of the ways we play in the snow is making a 3-Dimensional sculpture called a snowman! Have you made a snowman this year? Well, we are going to draw one!
Snowman Drawing Project for Kindergartners
Materials
-White paper
-Pencil/eraser
-Color drawing media (crayons, colored pencils or markers)
Steps
First, practice drawing circles! Make some circles big, some small, and some medium! After practicing circles, turn the paper over to draw our snowman!
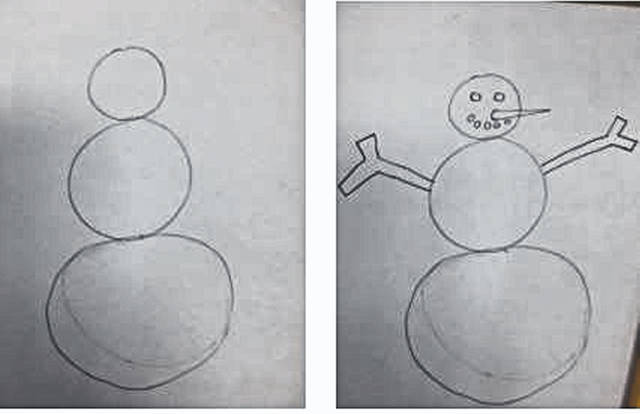
Diagram 1
Draw a medium circle at the top of the paper for a snowman head. Right below that, draw a little bit bigger circle for the middle of the snowman. Then draw the biggest circle at the bottom for the snowman bottom.
Remember to do your best, but it does not have to be perfect to be good!
Diagram 2
In the head, draw two small circles for eyes.
Off to one side, draw a carrot for a nose—almost like a triange! Then draw more little circles under the nose in a smile shape for your snowman’s mouth.
The arms will have two sides and look like fat/wide letter “Y” shapes.
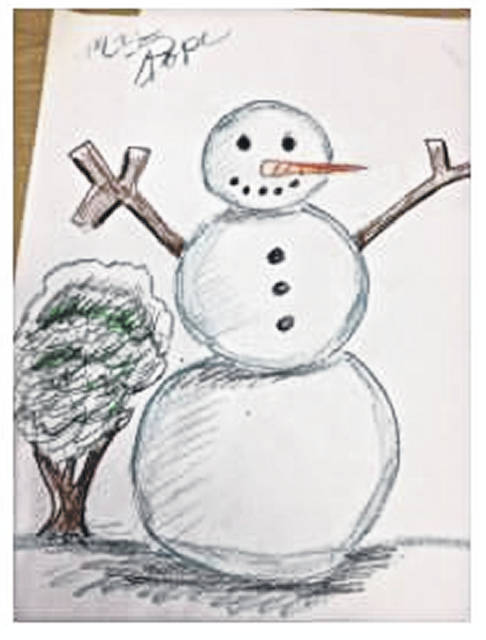
Diagram 3
Once your snowman is drawn, have some fun and add color to your snowman! You can even add clothes. Draw things around your snowman like trees, bushes or more snowmen! Also, If you color the edges of your snow blue, it will look like snow!
When you are finished with your snowmen, take a picture of your artwork with you holding it and send it to me! I can’t wait to see what you made! Send to [email protected]


